IoT Saga - Part 3 - Websockets! Connecting LiteCable to Hanami
Hello, Today I’d like to talk about how I’m using Websockets in Hanami. Well, when I was starting I added the following line inside my application.rb but after that I was worried about it.
security.content_security_policy %{
  connect-src: ws: 'self';
}
I was using PahoJS to connect to MQTT directly, but I think it isn’t a good option because credentials can be exposed. And, above all I have to control who is receiving and sending data through MQTT in future.
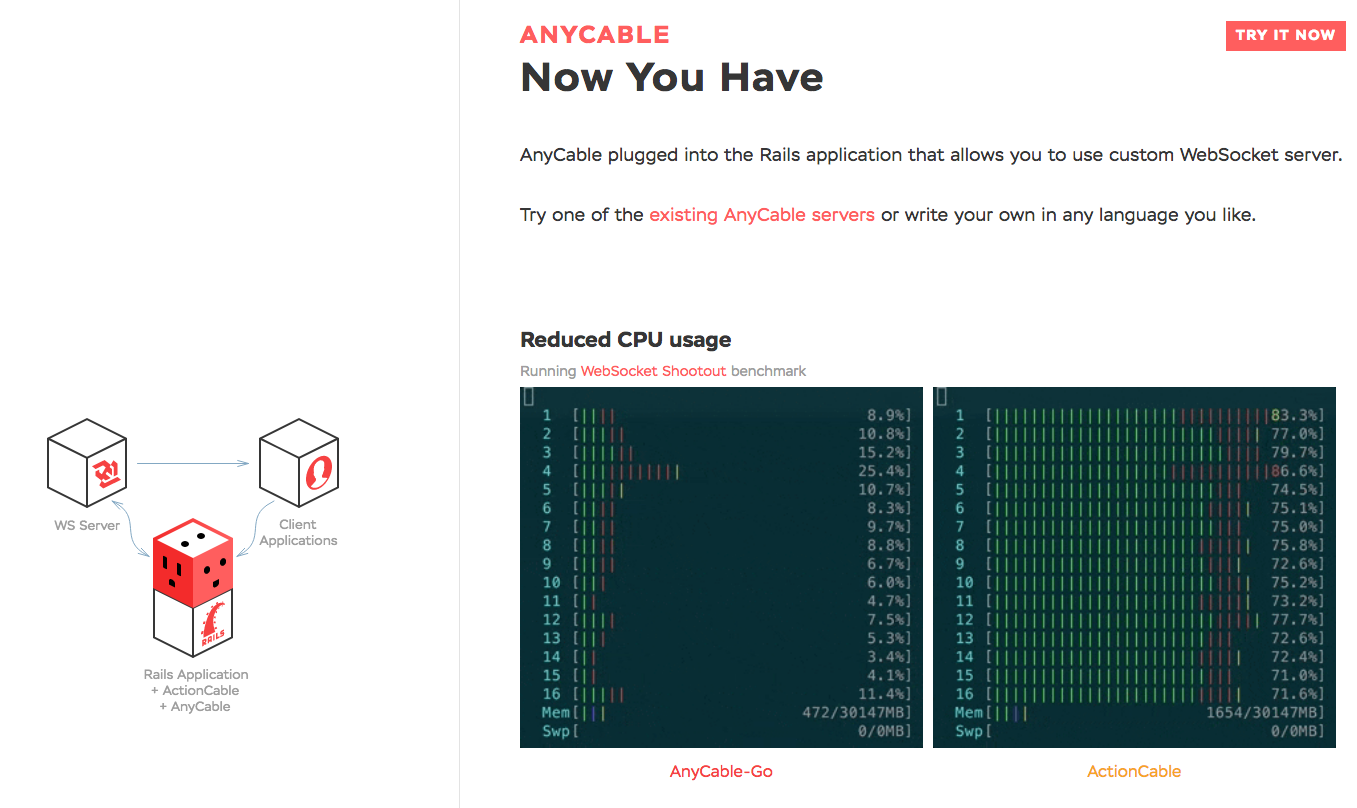
I started to search on the Internet a good option when suddenly I saw this page:

That sounds good, then why not?!
How it works
Vladimir Dementyev(@palkan_tula) recently wrote a post about it, From his point of view Ruby and Rails aren’t the best option for websockets based his experience and benchmarks, a decision has been made then they (Anycable.io) decided to extract the WebSocket responsability to another language, in this case, the language selected was Go. Anycable-Go deals with the websocket management and many other things without know of any business logic.
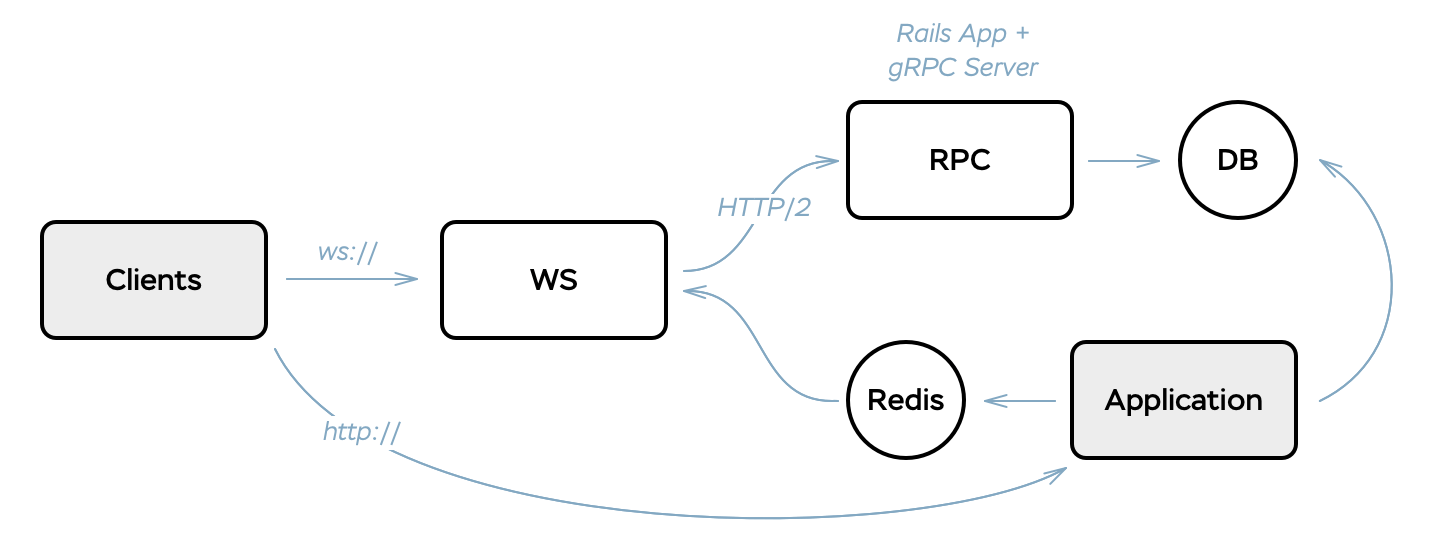
To deal with this layer, we need to create our classes to manage our rules, however how does AnyCable WebSocket(Go) connect to a Ruby Application?
They solved this problem using a gRPC client connected to another ruby process like the following picture.

- Extracted from: https://evilmartians.com/chronicles/anycable-actioncable-on-steroids
Well, They explain all pieces in this post, it’s very interesting, please check it out.
I chose Hanami as Framework, I was looking for anyone that already made the connection between Hanami and Anycable but I didn’t find anything. That’s is reason why I decided to do it by myself and I will share my experience along this post. Fortunately, Anycable already has a example using Sinatra, I basically followed these steps changing some pieces, let’s start!
Adding pieces to setup
Firstly, we need a script to start our RPC server. I used the following code to start the Anycable RPC server and load all Hanami dependencies.
require "rack"
require "anycable"
require "litecable"
require_relative './config/boot'

LiteCable.anycable!

Anycable.configure do |config|
  config.connection_factory = Usgard::Ws::Connection
end

Anycable::Server.start
This server is a rack application then rack is required to run it, and also the ‘config/boot.rb’, which will load all Hanami components using ‘Hanami.boot’. After that the line ‘LiteCable.anycable!’ will enable the anycable compatibility mode. We must configure the class responsible to handle the connections, in this case ‘Usgard::Ws::Connection’. In the end, the server is started, then ‘Anycable::Server.start’ do it.
In sinatra example they’ve shown how start anycable-go and the RPC server using hivemind to start all processes. I use docker-compose, then I added the following lines to my compose file.
services:
  #More stuff here
  rpc:
    build: .
    command: bundle exec ruby anycable
    volumes:
      - .:/usgard
    env_file:
      - .env.development
    environment:
      - ANYCABLE_REDIS_URL=redis://redis:6379/0
      - ANYCABLE_RPC_HOST=0.0.0.0:50051
    depends_on:
      - redis
      - db
  anycable:
    image: 'anycable/anycable-go:0.3'
    ports:
      - "8080:8080"
    environment:
      - ADDR=0.0.0.0:8080
      - REDIS=redis://redis:6379/0
      - RPC=rpc:50051
    depends_on:
      - redis
      - rpc
- Ps:. You can check this file here
RPC server starts running ‘bundle exec ruby anycable’ and the Anycable-Go image will start automatically, Some environment variables are required, though. Anycable uses Redis to manage the connections and broadcasts.
Ps:. The variable ‘DATABASE_URL’ must contains the connection string when ‘Hanami.boot’ is executed!
Now, the basic infrastructure is prepared to handle all websocket connections. Finally we can start to add the business logic.
Creating Channels and Connections
LiteCable is a ActionCable implementation, I think Rails defines whole concepts behind it very well. The paragraph below has been extracted from Rails doc.
For every WebSocket accepted by the server, a connection object is instantiated. […] The connection itself does not deal with any specific application logic beyond authentication and authorization. - Rails ActionCable Overview
So, we need to create a connection class to deal with this layer.
module Usgard
  module Ws
    class Connection < LiteCable::Connection::Base
      identified_by :user, :sid

      def connect
        #Ps:. I don't have authentication in this project, yet.
        @user = 'usgard' #cookies["user"]
        @sid = request.params["sid"]
        reject_unauthorized_connection unless @user
        Hanami::Logger.new.info "#{@user} connected"
      end

      def disconnect
        Hanami::Logger.new.info "#{@user} disconnected"
      end
    end
  end
end
Rails defines channels as “a logical unit of work, similar to what a controller does in a regular MVC setup.” So, a Channel class is required, I used the following class for my actuators.
module Usgard
  module Ws
    class Channel::Actuator < Usgard::Ws::Channel
      identifier :actuator

      def subscribed
        reject unless actuator_id
        stream_from "actuator_#{actuator_id}"
      end

      def speak(data)
        Hanami::Logger.new.info "#{@user} connected"
        LiteCable.broadcast "actuator_#{actuator_id}", user: user, message: data["message"], sid: sid
      end

      private

      def actuator_id
        @actuator_id ||= params.fetch("id")
      end
    end
  end
end
We already have all backend structure, besides we have to build the consumers at frontend.
Consuming websockets
Well, In Anycable page they mention:
“AnyCable uses ActionCable protocol, so you can use ActionCable JavaScript client without any monkey-patching.” - Anycable
I used the same JS of Rails, this JS is available here, and it handles the communication and keeps the websocket connection alive:
We can create our JS abstraction, but not now. I would rather use the cable.js, then I downloaded the JS and added to my application.html.slim
  == javascript 'cable'
  == javascript 'channel'
But, wait a moment, What’s that channel.js? This JS is responsible to create the channel, I’m using the Revealing Module pattern on my JS, from my point of view it’s a good JS pattern and I guess it can be changed easily later.
App.channel = (function() {
  function init(configuration) {
    return configureCable(configuration);
  }

  // configure and create cable using identifier and functions
  function configureCable(configuration) {
    return createCable().subscriptions
             .create(configuration.identifiers,
                     configuration.functions);
  }

  function createCable() {
    return ActionCable
             .createConsumer('ws://localhost:8080/cable'
                             + '?sid=' + socketId());
  }

  // Unique identifier for a connection
  function socketId() {
    return Date.now + generateRandomNumber();
  }

  function generateRandomNumber() {...}

  return {
    init: init
  }
}());
After that we have to create the JS deal with the incomming messages and send them to the WebSocket. I used the following code. I wanna build something like a terminal, which one I have to send messages to actuators channel and receive it.
PS:. I omitted some javascript of examples to turn easier to understand, however this code is available here
App.sensor = (function() {
  var config = { container: "display_box", channel: "actuator",
  user: "usgard", socket: null };

  function init(configuration) {
    config =  Object.assign({}, config, configuration);

    config.socket = App.channel
                       .init({identifiers: identifier(),
                              functions: subscriptionFunctions()});

    addListeners();
  }

  function identifier() {
    return {
      channel: config.channel, id: config.identifier
    };
  }

  function subscriptionFunctions() {
    return { connected: onConnected, disconnected:  onDisconnected,
             received: onReceive }
  }

  // These functions will be evaluated when cable trigger the subscriptions
  function onDisconnected() {
    appendMessageToBox({ user: 'system', message: "Connection Lost" });
  }

  function onReceive(data) {
    appendMessageToBox(data);
  }

  // Similar to onReceive function
  function onConnected() {
    // { ... }
  }

  // This function will handle the message when enter is typed
  function addListeners() {
    return getConsoleInput().addEventListener("keydown", function (event) {
      if (event.which == 13 || event.keyCode == 13) {
        onEnter();
        return false;
      }
      return true;
    });
  }

  // Sends to ActuatorChannel
  function onEnter() {
    config.socket.perform('speak',
                          { message: getMessageFromConsoleInput() });
  }

  // Create HTML elements
  function getMessageFromConsoleInput() {
    // { ... }
  }

  // Some other functions { ... }

  return {
    init: init
  }
}());
In the end, we have the HTML - in this case I used slim. So, here it is.
div
  h1 #{actuator.name}

  p id='actuatorid' style='display: none' #{actuator.id}

  dl.dl-horizontal
    dt id='mqtt_topic' #{actuator.mqtt_topic}
    dd #{actuator.description}

  div.col-md-7
    label Message
  div.col-md-5
    div.display_box id='display_box'
    div.col-xs-offset-0.form-group
      input.form-control id='console' type="text" name="msg"

  div.row
    button.btn.btn-secondary id="status" Status
    button.btn.btn-danger id="delete" Destroy

  == javascript 'actuator'

  javascript:
    App.sensor.init({identifier: "#"});
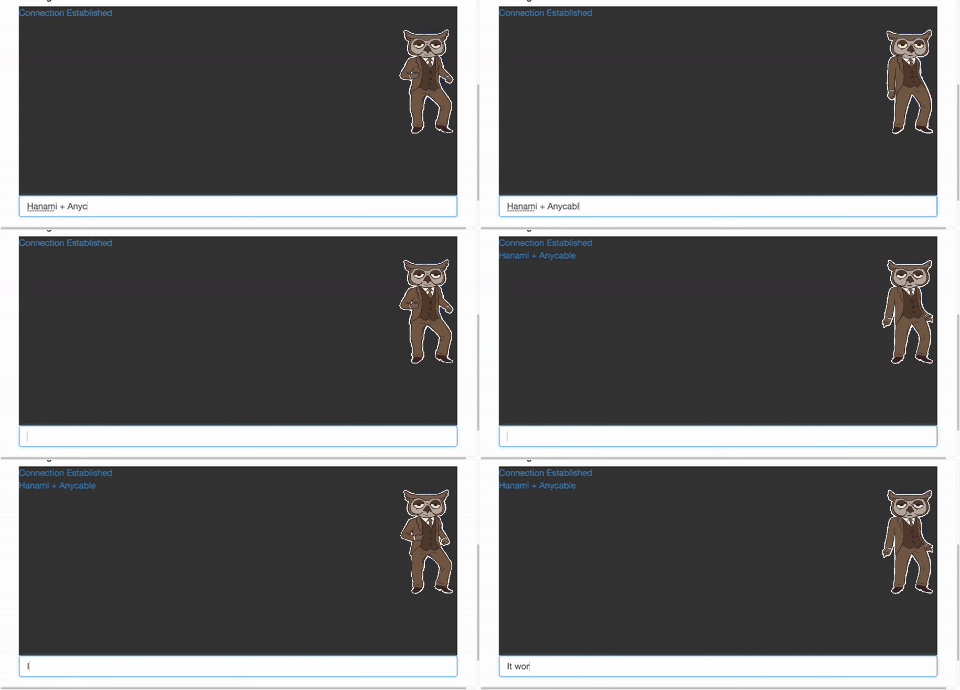
And it works! All changes that I’ve been made can be found in this pull request and also the Repository is available, please feel free to check it here.

Well, Do you like this post? Please feel leave your comments and share it with your friends, Thanks!
References
- http://anycable.io
- https://evilmartians.com/chronicles/anycable-actioncable-on-steroids
- http://guides.rubyonrails.org/action_cable_overview.html
- https://addyosmani.com/resources/essentialjsdesignpatterns/book/#revealingmodulepatternjavascript
- https://github.com/palkan/litecable/tree/master/examples/sinatra